

A Workshop Checklist for Recommending the Right Bike Engine Oil
Share

View the latest digital editions of all of our publications or head straight to the archives

Share
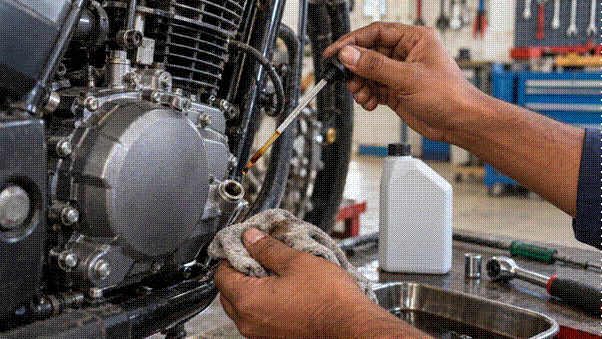
A bike engine needs different oil care as it ages. In the first months, new parts are still settling against each other. After years of daily riding, the same parts carry wear, and the oil works harder to protect them. The oil grade, the filter and the method of changing the oil therefore need fresh thought at each stage. Riders who understand this can ask better questions at the workshop, and mechanics who understand it can give clearer advice to every customer. This checklist follows a bike through four service stages and explains how to choose the right bike engine oil at each one.
Four details shape every oil choice, and the rider and the mechanic can confirm them at the start of each service. The OEM schedule in the owner’s manual or service booklet lists the viscosity grade, the JASO rating, the oil quantity and the change interval. The condition of the bike shows what the engine needs today, so look for oil leaks, listen for unusual noise and note the colour of the old oil. The duty cycle describes how the bike is used, since stop-and-go traffic, highway rides and daily deliveries wear oil at different rates. The load matters too, because a pillion rider or luggage raises engine temperature, and hot oil wears out faster.
Riders who want the basics can read this explainer: what is engine oil. The first stage applies these checks to a new bike.
During running-in, the new parts of the engine settle against each other and release fine metal particles into the oil. The first service removes this oil together with the particles it carries, so the mechanic should drain the oil completely. A top-up would leave the particles in the engine. Use the viscosity grade and JASO rating listed in the owner’s manual, and clean the oil strainer or replace the filter, depending on the model.
The service booklet gives the due point, which usually comes earlier than for later services. At the visit, the mechanic checks for early leaks, chain tension and clutch feel. The rider should also describe how the bike was used during running-in, because hard acceleration and heavy loads put extra stress on the first oil. After this service, the engine has settled in.
After the first service, the engine parts work together smoothly, and the oil stays cleaner between services. Keep the same oil grade as before, so you can judge how the engine behaves from one service to the next. The mechanic should drain the oil completely at each scheduled service. Between services, the rider can top up with the same oil that is already in the engine.
Some bikes need a new filter at every oil change and others at alternate changes, so follow the OEM schedule. The mechanic should also examine the drained oil. If it looks dark, thick or gritty, find the cause before the bike leaves the workshop. A bike ridden in heavy city traffic may need an oil change before the scheduled date, since stop-and-go riding and heavy loads wear oil faster. The next stage covers the years that follow.
By now the riding pattern is clear, so the oil can be matched to it. Every oil must meet the manufacturer’s specification in the manual, and the right bike engine oil for this bike sits within it. Within it, semi-synthetic and fully synthetic oils suit heavy traffic, hot weather and heavy loads, provided the manual allows them. When comparing brands such as Gulf Oil, check the grade and JASO rating printed on each pack against the manual.
The mechanic should drain the oil completely at every change and replace the filter whenever the schedule requires it. A clogged filter cannot clean fresh oil. Treat the OEM interval as the starting point, and shorten it for dusty roads, daily deliveries or constant stop-and-go riding. After each service, the mechanic should record the condition of the oil and any faults on the job card, so the next visit starts with useful information. That record matters most once the bike has covered long distances.
After long distances, engine parts carry more wear, and a worn engine often burns more oil between services. The rider should therefore check the oil level every week and top up when it nears the minimum mark.
The mechanic should drain the oil completely at every service and replace the filter at every oil change. The grade must still come from the owner’s manual. If the bike runs in hot conditions, a higher-viscosity grade from the manual’s list may protect the worn engine better. Do not extend the OEM interval. Delivery and commercial bikes reach this stage sooner, so they need shorter intervals.
At every visit, look for oil leaks and blue smoke from the exhaust, and check the drained oil for metal particles. Any of these signs calls for a detailed engine inspection.
Every stage in this checklist rests on the same four details. The OEM schedule sets the specification, the condition of the bike shows what the engine needs today, and the duty cycle and load show how quickly the oil will wear.
Good records make the next decision easier. Note the oil grade, the filter change and the condition of the drained oil on the job card at every service, and keep a copy with the service booklet. A mechanic who reads it sees how the bike was maintained.
Workshops that explain their choices earn trust, and riders who understand their service ask better questions. A simple checklist, used at every visit, helps both sides look after the bike.




Leave a Reply